Showing posts with label horticulture. Show all posts

Tuesday, July 13, 2010

le jardin de pizza


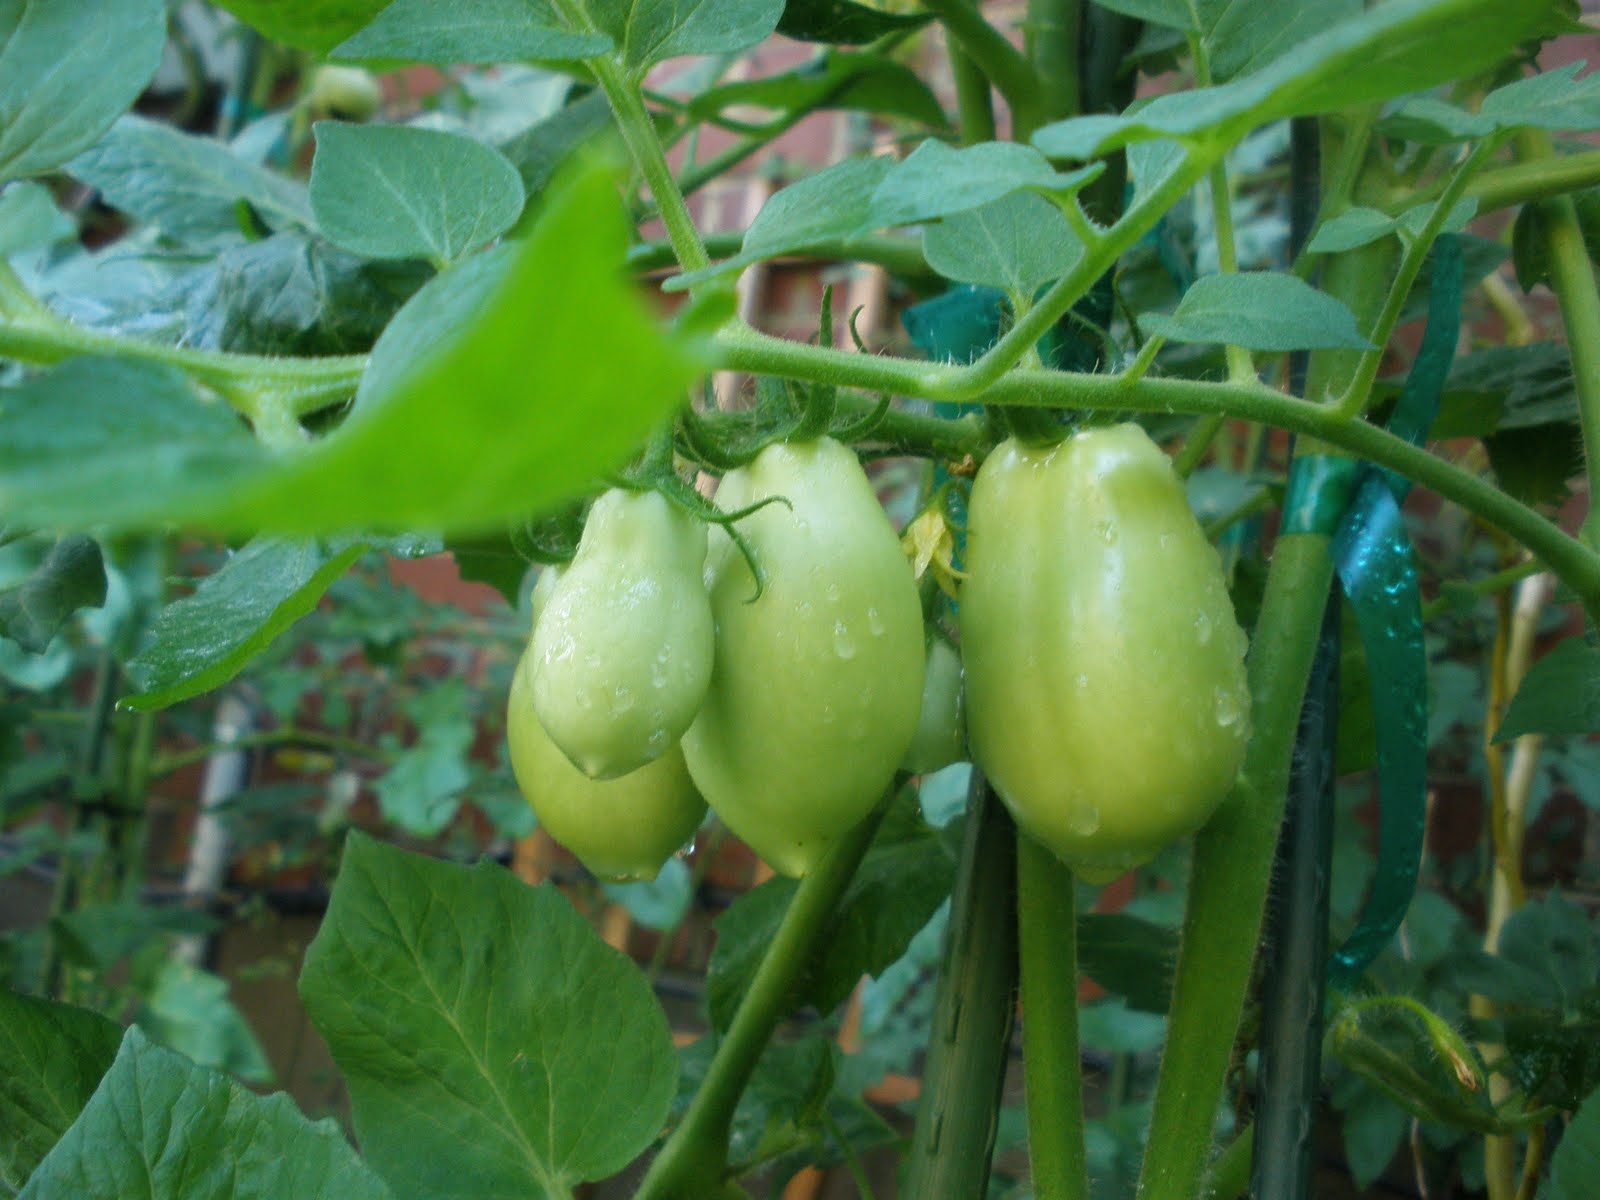
It has been 3 weeks since my last blog post and all I can say is I’ve been busy; and so has my garden. Last night we made a pizza using homegrown Roma tomatoes, basil, and bell peppers. It was so delicious, it has inspired this ‘pizza garden’ blog!

Part of the reason I have been too busy to blog was that I read 'My Life in France' in record time for my first book club meeting. Julia Child's book was absolutely delightful in every way; I felt as though I was travelling and eating all over France with her, ergo the blog's title. [Pizza, however, was not a part of her French culinary escapades.]

Pizza gardens are gardens that simply contain the ingredients one may want to put on a pizza. Looking into it, I found that ‘pizza gardens’ all usually contain at least tomatoes and basil. The rest of the ingredients/plants could include sweet peppers, hot peppers, oregano, onions, parsley, eggplant, scallions, rosemary, jalapeños, cilantro, spinach, etc.

This theme could be wildly popular with kids too; picture a raised vegetable/herb garden actually in the shape of a pizza pie, with dividers made to look like ‘slices’ of pizza! It was a lot of fun enjoying the ‘fruits’ of my vegetable garden labor. And as the Roma’s continue to ripen and the garden yields more peppers, I hope to try another pizza soon!

There are ‘Black Cherry’ tomatoes ripening everyday, from the bottom of the plant upward. That tomato plant is now almost 7’ tall. I also harvested my first ‘Big Boy’ tomato over the weekend and will be trying that soon. ‘Big Boy’ only has a few more tomatoes ripening so I’m a little disappointed in its yield.

‘Mr. Stripey’ has yet to produce any fruit, but I am hopeful as it continues to grow and flower. The other no-name tomatoes are still growing, but remain fruitless as well. The jalapeño plant is producing lots, though I have yet to actually try one. And the red bell pepper is growing like a weed, but hasn’t set fruit yet.

The Black-eyed Susan’s are blooming profusely, and look great next to the sedums which are finally flowering. The butterfly bush and Verbena are flowering nicely as well. Although I was surprised that the butterfly bush I relocated across the drive has a lighter bloom color, almost a soft pink/purple as opposed to the lilac of the parent plant.

The Rose of Sharon are starting to bloom more, but are darker in color than I was expecting. Now, the blooms are lilac with a darker, magenta eye. The hollyhocks have completely petered out and I see no signs of seed pods so I’ll be cutting them all back soon.

The mint is almost taking over that planting bed, but it is nice to smell. The evening primrose is still blooming, and its fragrance is light and lovely in the evenings. We’ve received plenty of rain lately, so I’ve been able to cut back on watering. Also, our mid-to-upper 90 degree days have cooled slightly. Until next time, happy gardening!

the image used above is not my creation, instead i found it here.

Tuesday, June 22, 2010

Cooper, my garden companion


Whenever I garden, my trusty watch dog is looking out for me. At the top of our hill, Cooper sits and keeps watch over the goings on of the street below. Now he may be simply looking for squirrels to chase, but I think he is genuinely looking out for me and our homestead while I am busy gardening away.

He sits there, at attention, sometimes for hours. And he always resumes his post in the exact same spot. Occasionally, he will take advantage of my inattentiveness to slip off and play with the neighborhood dogs or chase squirrels. For the most part though, he is my constant garden companion and watch dog.

I was pleased to discover a plant that I thought might be a ‘weed’, turned out to be garden phlox (Phlox paniculata). I had kept several of this tall plant with strap-like leaves in the hope it was something worth keeping and I’m really glad I did. They bloomed bright fuchsia this week, and after passing the ‘phlox test,’ I knew I had something special.

What is the ‘phlox test?’ I believe Dr. Alan Armitage taught me this, but I’m not totally sure. Basically, if you pull the flower petals out of the stem and they remain as one flower unit instead of separate petals, than you have a phlox. Seems elementary (and it is) but I have found this technique very useful in plant identification. After all, there are hundreds of phlox species ranging from groundcovers to 4’ tall perennials, and a wide variety of flower color.

Bright fuchsia is not a color I would have ever picked for my garden, but I love it. It’s so vivid and eye-catching. This phlox is supposed to bloom throughout the summer and into the fall. We’ll see how it looks with the other summer blooming flowers…

The tomatoes and herbs are doing well. The Black Cherry’s are the first tomatoes to start turning a reddish color. My singular jalapeño fell off the plant, so picked it up and may try it out soon in some cooking, despite it’s small size (about 1 ½” long). I need to fertilize the veggies again, maybe today. I try and fertilize a few times a week with a liquid fertilizer.

I’m still a little befuddled by the Hollyhocks and Rose of Sharon. The Hollyhocks bloomed well, but only bloomed white. And the Rose of Sharon (there are five plants in total) have had less than three blooms combined. I have neighbors with Rose of Sharon’s that are covered in blooms.

I have found many tips for improving my Hollyhocks next year, like pinching off new growth a few times before flower buds appear. And I can also conceive that since this is the first growing season the Rose of Sharon have been in the ground, maybe they are focusing more on foliage than flowers. Bottom line, these plants may just need more sunlight.

This is an unfortunate conclusion, because I have only one ‘full sun’ planting bed. And it’s getting very crowded as is. But alas, since these Hollyhocks and Rose of Sharon are so important to me, I’m sure I’ll be relocating some to the west side planting bed this fall.

Another Hollyhock issue that has developed is Hollyhock Rust (Puccinia malvacearum). This fungus is characterized by yellow-orange bumps throughout the leaves and stalks of the plant. At this point, there’s not much I can do except remove unsightly foliage.

In the fall I will be sure to cut back the Hollyhocks hard and destroy all foliage instead of composting. I may consider an early spring fungicide application as well as spread the plants out more to improve circulation.

My garden is on the cusp of having lots of blooms and veggies by the end of the month. I hope I can keep up with all of the watering until then. It’s been topping out in the mid-nineties here lately with rain showers few and far between.

Wednesday, June 16, 2010

tall tomatoes and such


Now my tomatoes are taller than me, 5'-5". Well Big Boy and Black Cherry are at least, with Roma (pictured) right behind. Mr. Stripey had a later start and I’ve even relocated him once so I’m not surprised his growth is dwarfed by the others. I may have to buy several more, larger stakes to secure the three larger tomatoes, which continue to reach for the heavens.

The three large tomato plants all have multiple baby tomatoes that grow larger and more numerous everyday. I need to prune out some of the excessive foliage and suckers ASAP. And, I have a baby jalapeño! So far, however, that’s my only pepper.

I won’t be posting photos of my herb pot anytime soon, it has seen better days. The thyme is doing great and the parsley is fine, the variegated basil even looks to be making a comeback. But the cilantro has ‘gone to seed’ and looking worse each day. I’m hoping I’ll be able to harvest some coriander, but I’m not holding my breath.

I have planted a new basil plant and hope to add others as I count more tomatoes everyday! The Rosemary is doing great and has probably doubled in size since I planted it earlier this year. And the mint is going gangbusters, taking over the driveway planting bed.

Also in the driveway planting bed, the last remaining Hollyhock flower buds are blooming. Still all white! And the Rose of Sharon (pictured) has begun to bloom! I have counted only two blooms so I’m hoping for more. It is one of my all-time favorite flowers; admittedly this may be because they remind me of my grandparents, but nonetheless, gorgeous.

Back across the drive, in the west side planting bed, the Black-eyed Susans have begun to bloom. They will look great alongside the pinkish reds of the sedums and daylilies close by. Along with the tiger lilies, the pink/red, orange, yellow combination is actually quite lovely.

Also, I have discovered that a beloved annual, Verbena bonariensis, has reseeded itself. While not the most ideal location (in the front of the flower border), it’s a welcome surprise! This annual has rose purple flower clusters at the end of slender square stems growing 4’ or more in height.

I prefer this plant in the back of the flower border, and often pinch it back a few times to induce a more compact habit. Once it starts blooming, you will have color on into the fall. Another benefit is this plant attracts butterflies and gold finches. The only downside is an occasional powdery mildew episode; if this occurs, I just cut back all affected foliage.

And finally, a favorite perennial planted on the bank at the rear property line, the evening primrose (Oenothera), has begun to bloom! I don’t know much about this plant, but I’m delighted that it seems to have spread and I now have at least twice as many plants as last year. [I believe it spreads by seed, because one popped up in a nearby pot.]

I’m amazed that this inconspicuous plant has thrived where it has, competing with the likes of ivy and euonymus. As the name suggests, swirls of buttery yellow blooms open up after the sun goes down. It’s great in combination with the tiger lily; especially since they both bloom at a height of 3-4’. The flowers are truly beautiful, and the perfect crescendo to a summer day.

Friday, May 28, 2010

oh happy day


Well it’s happened; my hollyhocks have begun to bloom. This is a momentous occasion. Just think, twenty one months ago I was harvesting Hollyhock seed from the stand of flowers outside of THE Hollyhock house, and now I have my own stand of blooming Hollyhock flowers!

These flowers are descendents of the very flowers that Frank Lloyd Wright himself may have planted but certainly planned for and gazed upon. I feel like I have a small piece of exquisite American architectural history growing right here in my Nashville garden. It has been a long journey but totally worth it.

Right now, there are only two white flowers blooming, but I’m hoping that some other colors will show up soon. The flowers at the Hollyhock House ranged from pale pink to rosy-pink. I guess now I’ll research how they are pollinated so that I can have some more seeds to plant for next year.

I think packaging and selling seeds from the flowers at the Hollyhock House would be an amazing fund-raising opportunity for the Hollyhock House. If you’ve been there, you know they need every dollar they can get for restoration and maintenance. I think I’ll send them a note right now!

Thursday, May 27, 2010

bugs are gone!


The ant/aphid infestation on my Rose of Sharon is completely gone. And since spraying my hollyhocks with Sevin I haven’t seen any more hollyhock sawfly larvae chomping away. They still haven’t bloomed, but I’m hopefully every day when I come home from work to catch a glimpse of color.

Last weekend I removed a portion of my Black-eyed Susan’s in the west side planting bed to make room for two more pepper plants and give my rosemary some more space. In addition to the new red and green bell peppers, I also planted an heirloom tomato in the driveway planting bed. I’m hoping it will get enough sun there, because I’m running out of space elsewhere.

Mr. Stripey, as he’s called, is an old-fashioned beefsteak that will have yellow and red stripes outside and mostly yellow coloring inside the fruit. It has tiny leaves and the flavor is supposed to be sweet and mild. We’ll see in approximately 56 days!

I think I initially underestimated the support my tomatoes would require. But now I regret skimping on the stake size, because my ‘big boy’ and ‘black cherry’ tomatoes have already grown almost to the top of their stakes. So, I will have to purchase taller/stronger stakes to support these veggies and re-tie all of the tomatoes. Bummer.

I also (finally) replaced the pansies in my pots by the front steps with a ‘lemon chiffon’ million bells (Calibrachoa) in each pot. I’m not usually one for monochromatic pot plantings, but my front door is hardly used and there’s enough going on in the nearby planting beds to warrant simple pots.

My oakleaf hydrangea (Hydrangea quercifolia) have started blooming on both sides of the front door and look really great behind my patch of catmint (Nepeta) to the right of the front door. To balance that, the Nepalese columbines I planted on the left side of the front door bloomed well and are slowly taking over one side of that planting bed.

The Hellebores are still blooming and look great next to the sensitive ferns (Onoclea sensiblis) out front. My Iris have finished blooming and I need to weed the bed by the mailbox to get it ready for the daylilies which will start to bloom soon.

The only other annual I have added this season is a ‘Mini Blue-Veined’ Supertunia. I added this to my blue pot with the Salvia and Spirea. The salvia has already started blooming and the Spirea will soon follow.

My herb pot is not looking so good. The cilantro started to bolt last week, so I cut off some of the flower buds. The basil, which has been looking ill ever since the floods, now looks awful. My parsley and thyme are the only things doing well. They seem to have had good drainage and decent sun where they are. I may have to start over with new cilantro and basil, maybe even from seed.

Tuesday, April 27, 2010

veggies and such


The tomatoes I have included in my garden thus far include Roma, ‘Black Cherry’, and ‘Big Boy’. Roma is a smaller tomato that should have a plentiful harvest starting in 70-80 days from transplanting. ‘Black Cherry’ is a sweet-flavored, round dark cherry tomato that should ripen within 60 days of transplanting. ‘Big Boy’ is a meaty, large hybrid introduced by Burpee in 1949. ‘Big Boy’ will ripen within 80-90 days from transplanting.

So, by the end of June, I should be harvesting the first tomatoes. I would still like to add an heirloom variety tomato and some more varieties of peppers. I have already planted one Jalapeno pepper which will ripen in 78 days.

Everything else in the garden is doing great. My Iris is now blooming very well by the mailbox, white and yellow blooms. The Baptisia and Peonies are about to bloom. My Azalea in the secret garden is blooming wonderfully.

The only pest problems I’ve had continue to be the aphids and ants on my Rose of Sharon. I used soap spray on them last week, but it has rained off and on since then so I don’t think it’s had a chance to work yet. I’ll keep trying the soap spray.

The photo is of my ‘herb garden’ container and some other perennial plant containers that I keep directly off my back deck. I'll probably add a petunia or million bells to the blue pot soon. But, I love all the different colors foliage and the pots themselves provide right now, without a single flower!

Wednesday, April 21, 2010

taking up space, in a good way!


I finally planted my herb garden (in a pot), Roma tomato (with stake), and all of my hollyhocks. In order to plant the tomato, I had to relocate some Black-eyed Susans and realized I just have too many. So, in addition to the previously offered sedum, mint, and creeping jenny, I would also like to offer some Black-eyed Susans.

When planting the tomato, I was reminded that all tomatoes are virtually vines. Because tomatoes try to root wherever the stem touches soil, planting lower will create more roots and better support. I removed the lowest pairs of leaves and then literally back filled the hole just under the first leaves. I put a 4’ green stake next to it and will use flexible cloth ties to secure it as it grows.

I also finally got to plant my new blue pot! I relocated an existing Salvia and ‘neon flash’ Spirea to the blue pot and will add some sort of flowering, trailing annual as well. The pot itself was already quite heavy and the thought of filling it with soil was less than attractive. For this reason, I put two empty plastic bottles in the bottom to take up some space (pictures). This is a great way to save soil and reuse some of those plastic bottles too!

The aphids (and ants) are still coming back on my Rose of Sharons, so my next step is to spray them with a soap solution. There are a variety of homemade soap spray recipes on-line. I think I’ll just mix some dish soap and water in a small hand-sprayer and see how that works.

Thursday, April 15, 2010

a redneck garden


After moving to Nashville I kept hearing the term ‘Redneck Garden’. This term refers to an ornamental garden that includes edible plants normally associated with a vegetable garden. [I’ve chosen to ignore other components of said ‘redneck garden’, i.e. beer can wind chimes and the like] I’ll concede the idea was a foreign one to me, having grown up with a separation of ornamental and vegetable.

However, when you think about it, it really makes sense. I don’t know many people that have the space for fully separate ornamental and vegetable gardens, at least in an urban setting. Also, I think most people forget how aesthetically pleasing some veggies can be. Not to mention, growing your own vegetables saves money! So why not grow veggies in our flower beds?

I’m totally on-board and look forward to having my very own redneck garden soon. Just think of the positive consequences this idea could have if implemented in low-income ‘food deserts.’ We could all be eating better and/or more cheaply if we grew a few tomato plants in with our holly bushes, as an example.

The attached photo shows peppers grown alongside Salvia and Black-Eyed Susans. The color combination is phenomenal. I think I’ll achieve a similar effect planting veggies next to my Butterfly Bush and Black-Eyed Susans. Aesthetic benefits aside, growing some ornamentals like Marigolds with your tomatoes will actually prevent pests.

At the garden center this week I found a variety of herbs and vegetable starters available. For $15, I picked up Italian parsley, variegated Basil, a variety of Cilantro, and a Roma Tomato plant. Those herbs, along with the thyme and mint (and Rosemary) I already have will complete my herb ‘garden’ (which will actually be a pot to ensure good drainage).

The Roma tomato plant caught my eye because my boyfriend really likes Roma’s. But I’m also trying to grow several different varieties of tomatoes to hedge my bet that some will thrive. I should be able to plant all of these this weekend, and I’m still searching for more tomatoes and peppers to add.

Wednesday, April 14, 2010

Ants and things


Things are growing great in the garden. I spent some time last weekend weeding several beds and trying to ‘thin the heard’ of mint, creeping jenny, and sedum. Would anyone like to come over and take home a sampling of these voracious ground covers?! I also mulched a little and amended the soil for the Hollyhocks which I will be planting this week!

The Hellebores are still blooming. The Rosemary is blooming now, pretty little blue flowers. The Peonies, Baptisia, and Iris will all be blooming soon. My Epimediums are now blooming in my side shade garden (picture). That’s a really neat perennial for the shade garden. They are also commonly referred to as Barrenwort and Bishop’s hat.

Epimediums are grown as much for their flowers as they are for their heart-shaped foliage which can take on beautiful fall coloring. Their tiny flowers are suspended ever so gracefully on their arching flower stalks. Epimediums make great accent plants and groundcovers, although they die back almost completely in our zone. I like to pair my yellow blooming Epimediums with purple-leaved plants like Ajuga and Heuchera.

I recently discovered ants on some of my Rose of Sharon. I fear the ants are ‘milking’ aphids which in turn are feasting on the new foliage. This morning I sprayed the bugs off with water, let’s hope that keeps them away. My next approach may be to use a soap spray. I generally try to avoid using any chemicals in the garden, but especially now that I’m growing edible plants, that would be my last resort.

There are ants on my Peonies as well, which are across the driveway. I have come to expect this every year on the Peonies. [Although at first it was alarming and I admit I sprayed my Peonies with ant killer chemicals that first year] A very knowledgeable gardener explained to me that ants help the Peony buds ‘open up’. So now I ignore the ants, and my peonies have never suffered because of them.

Tuesday, April 6, 2010

Spring Update


The garden is growing everyday and this has been a really pretty spring in Nashville. I haven't worked in the garden too much lately as I've been out of town and working on other projects around the house, e.g., cleaning my wood deck and outdoor furniture. It's still technically too early to plant anything tender, though I doubt we’ll get another frost.

I can’t wait to get my Hollyhock seedlings into the ground; there are now only five left, but they are thriving! Also, I’ve started looking around for veggie starters and haven’t seen any yet. But I’m sure in a few weeks I’ll have my pick of tomato and pepper varieties.

Right now, I’m just enjoying watching everything leaf out and come out of the ground. My peonies are now over a foot tall. I completely forgot about my Baptisia, until they poked through the soil (I think they bloom yellow). My Dogwood tree in the front yard is starting to bloom (white) and the Hellebores are still going strong!

My Rose of Sharon (Hibiscus) are now leafing out too. This always surprises me because they are one of the last woody plants to leaf out every year and it always makes me nervous that they may be dead. Throughout the early spring I do a scratch test on the bark to make sure it’s still green and confirm that they are still alive.

All of my Rose of Sharon are progeny of my grandparent’s Rose of Sharon. While this plant comes in a variety of bloom colors, mine bloom white to pale pink with a much darker center (see picture). This is literally one of my favorite flowers, and quite a low-maintenance plant to boot.

Ultimately, Rose of Sharon’s may reach 10-15’ in height and half that in spread. But it’s very easy to prune them into whatever shape you like. Also, their environment will play a role as they tend to be much denser in form and better blooming in full sun. I have seem them do well in partial shade too, though their appearance in more spindly. They work well as a single specimen or in a grouping.

This is a great old-fashioned shrub that I think is becoming more popular as people discover all of its assets. There are two main types of Hibiscus; one is a hardy woody shrub, the other more tropical type usually has larger blooms but needs to be cut back to the ground every year. I would recommend researching the colors/varieties and even seeing them in bloom before purchase. Or you can take your chance on seeds, which are usually plentiful in the late summer.

Monday, March 29, 2010

a word about Crape Murder


I saw something on my street this weekend that I’ve seen hundreds of times before, and it still gets me every time; someone cut their Crapemyrtle (Lagerstroemia spp.) trees almost to the ground. Maybe murder is too strong a word, since more often than not they come back very much alive. However, there is no need for this plant cruelty and aesthetic nightmare.

Some people feel this is the best way to maintain these trees. Other Crape murderers feel they bloom better with this treatment. Conversely, with proper (sometimes yearly) pruning, a Crapemyrtle specimen can take on the loveliest of forms. And with time, your Crapemyrtle branches will develop into the most wonderful example of mottled bark you have ever seen (see photo). Here's a link to some helpful information regarding proper pruning techniques for Crapemyrtles:

http://pubs.caes.uga.edu/caespubs/pubcd/C944/C944.htm#Pruning

Crapemyrtles are wonderful small to medium-sized (15-25’ in height), non-native, summer-flowering, deciduous trees. They come in a variety of colors ranging from white to pink, to purple, to red, and every shade in between. Some varieties even have nice fall color on their fine textured foliage. Crapemyrtles come in a variety of shapes; more formal specimens have only a single trunk, others can be multi-trunked.

My favorite examples of this tree are in Georgia. The Founder’s Memorial Garden at The University of Georgia in Athens, and gardens throughout the Savannah/Charleston area immediately come to mind. This photo is a particularly old and refined specimen located at Dumbarton Oaks in Washington, D.C.

Dumbarton Oaks is a beautiful (once private, now public) garden to visit if you’re ever in the Georgetown area of D.C. It was designed by the first female landscape architect, Beatrix Jones Farrand, through the patronage of Mildred and Robert Woods Bliss. It is a real gem!

Friday, March 26, 2010

longer days, more gardening adventures part 2


With eastern exposure, the planting bed across the driveway gets almost as much sun as the bed on the west side of the house. This planting bed sits between my neighbor’s fence and my asphalt drive and is only about 2’ wide. When I first moved in, it was nothing but Bermuda grass and I soon found out why. The soil is full of rocks. Every time I plant something new, I feel like I’m gardening in a rock quarry. On the bright side, the soil drains very easily.

Nevertheless I’ve removed most of the Bermuda (worst gardening chore ever) and amended the soil with soil conditioner. On the left is my recently transplanted butterfly bush, which I cut back to about 18” in height. The other 5 shrubs you see are Rose of Sharon (Hibiscus), a plant very near to my heart, which hasn’t quite leafed out yet. Between the Rose of Sharon groupings are several Hollyhocks (from the Hollyhock House!) that have over-wintered.

Beneath the shrubs are several sedum varieties as well as mint (Mentha). This aromatic herb (non-native) spreads quickly by way of underground rhizomes and I like to caution people that it should be planted in a contained/ well-maintained area. In the right corner of the bed are coral-blooming Canna Lilies. But after this past winter, I’m not holding my breath to see if the Cannas will make an appearance this summer (they can be borderline in zone 6b).

On the right edge of the photo, you can see the outstretched branches of a Mulberry tree (Morus), which has little to no landscape value. However, because this volunteer (which is actually rooted on my neighbor’s property) started growing in a fan-shape on my side of the fence, I’ve elected to train it as a ‘living fence’; to create a vertical screen between the two properties. Nothing against my neighbor, but I don’t prefer to see into her living room from mine.

The main goal of this bed is to increase my gardening space as well as improve the aesthetics of the space. Also, I’m not sure how much longer my neighbor’s fence will hold up, so I wanted to get some plants going ASAP. On one hand, it may have been more prudent to plant a row of Arborvitae or another evergreen, vertical screen. However, all of these plants were free to me, and will provide much more seasonal interest than a green wall.

And like the last blog post, this photo is not much to look at right now; but hopefully by this summer, there will be tons of beautiful blooms!

Wednesday, March 17, 2010

a good day to be GREEN


Spring is upon us. Everyday, driving around town, I notice the new blooms of daffodils, crocus, cherry trees, and witch-hazel. But the only thing blooming in my garden right now is Helleborus orientalis, the Lenten Rose. This is one of my favorite perennials. It is beautiful, evergreen, versatile, durable, hardy, and above all else, extremely low-maintenance. What more can you ask for in a perennial?

I was first introduced to this awesome plant by Dr. Allan Armitage, while a student at UGA. He is one of the foremost perennial plant experts and a big proponent of Hellebores. While I call most plants by their botanical (genus) names, it is rare that most people (non-horticulture-types) would do the same. The Hellebore, I’ve found, is one of the exceptions to this rule. Another interesting thing about Hellebores is that the blooming part of the plant is not actually a ‘flower’ or ‘petals’ at all, rather they are sepals, or modified leaves.

There are generally two species of Hellebores available at retail garden centers: Helleborus orientalis (Lenten Rose), and Helleborus foetidus (Stinking Hellebore). Helleborus orientalis is the only one in my garden, so that’s what I’m talking about when I say ‘Hellebore’. However, H. foetidus is a lovely perennial in its own right with many of the same characteristics, but having finer leaf texture. [Also, I don’t find that it particularly smells bad and I’m afraid its common name may turn people away from a perfectly good plant.]

An evergreen perennial, Hellebores can form clumps of dark green, coarse foliage with blooms reaching 18”. There size increases over time, but I generally think of them as 12” tall perennials. Hellebores do well in full shade and full sun. However, the best balance of foliage and blooms probably occurs in a partial shade environment. Full sun exposure produces prolific blooming, but can scorch the edges of leaves. Hellebores will become quite drought tolerant once established, but prefer regularly moist soils.

Obviously there is a connection between the common name and the bloom time, Lent. It’s a great time to have something blooming in the garden since everyone I know is incredibly anxious for spring right now. Hellebores do not have very showy flowers, but the bloom is so beautiful and intricate, I find myself on hands and knees trying to get a better look. The true species has a creamy white-pink bloom that faces slightly downward and can have darker-hued splotching or fading on the interior of the sepals.

Hellebores have been cross-bred so many times that there is a kaleidoscope of color options to choose from. Blooms range from white, green, pink, purple, and everything in between. Sometimes there will be different colored-blooms on the same plant. Newer hybrids have created more compact and upright blooming varieties such as ‘Ivory Prince’, which is becoming very popular in the trade. The Hellebores in my garden bloom shades of pink, from rosy-pink to a purple-pink, the richness of which is hard to find elsewhere. Although gorgeous, this darker color does not stand out in the garden as well as the lighter blooming varietals.

I use Hellebores in my garden as accents in the perennial border alongside ferns, epimediums, and gingers. But they can make excellent groundcovers as well. They are highly effective when planted en masse for a bold flower display in late winter and a carpet of lush foliage throughout the year. The only maintenance I perform is occasionally removing scorched leaves in late summer/fall and spring fertilization when I fertilize the planting bed, that’s it!

I’ve been told (and have witnessed this in Dr. Armitage’s garden) that hellebores reproduce from seed eagerly. I have not yet experienced this in my own garden, but I remain hopeful; mainly because they are one of the more expensive perennials to purchase. Hellebores are native to Europe and Asia, but they will not displace our native species, so I advise planting as many as possible if you like what you read. I find Hellebores available for purchase year-round but I suggest buying them now, so you can see the flower color.

On a side note, the 6 Hollyhock seedlings are still surviving in the greenhouse and at least 3 plants appear to have over-wintered in my garden. This would be reason enough to celebrate but lucky for me it’s also St. Patrick’s Day! Happy Gardening!

Monday, March 8, 2010

the Greek word for Rainbow


This past weekend brought us beautiful spring weather and I was able to spend about an hour working in the yard on Saturday. The area I focused on is the small perennial bed next to my mailbox at the street. This planting bed sits at the start of a swale that runs along the front of my property parallel to the street. It’s an odd sort of depression that’s difficult to mow; from day one I envisioned a sinuous planting bed of perennials and shrubs to replace the grass in the swale and provide a colorful front border for the house.

Several years ago I was renovating my grandfather’s Iris bed in Knoxville and the process of dividing his Iris yielded several mulch bags filled with rhizomes. The flower takes its name from the Greek word rainbow, referring to the wide variety of flower colors available in the genus. Now I know that the Iris I planted bloom yellow and white. But at the time I planted my rhizomes, I had no idea what I might end up with.

Iris prefer full sun to bloom well, and they can grow very tall. I have seen some flower spikes reach 3-4’ in height. At the time I didn’t have a spot that I thought would work well for the Iris, so I decided to start my ‘swale’ planting bed. Turning a patch of grass into a planting bed is HARD work; when your lawn is comprised of Bermuda grass, it’s even harder.

I added a few daylilies to the front of the bed as well, given to me by my day-lily breeding uncle. The effect is quite nice with blooms from spring through summer. They actually bloomed well the first year, which was surprising. They had a good year last year, but I didn’t keep up with weeding very well. That’s why I pulled out two garbage bags of weeds (for the composter). Then I cut each Iris fan back to three or four inches from the ground. That is a maintenance task best performed in the fall, but I suppose it’s better late than never.

Next I’m going to mulch the bed with soil conditioner. Most Iris growers do not recommend mulching, because the rhizomes can rot so easily (especially in our humid climate). But I think a light top-dressing of soil conditioner improves the soil and looks really good. I’m still debating whether or not to fertilize this area since I don’t want to give the grass (weeds) a head start. Regardless, I’m looking forward to better maintaining the area and lots of blooms this year.

The attached picture was taken in 2008, and I sent my grandfather a copy of it. After my grandfather passed away last summer, I found this picture framed in his bedroom. Every time I see the Iris blooming, I think of him and his love of gardening.

Monday, February 15, 2010

in the beginning


During and after college I lived in 5 different apartments. Apartment living is great, except when you love and collect plants. For years, I schlepped far too many pots from one apartment to the next, always hoping for more sunlight and porch space than I was afforded. It didn’t help that I minored in horticulture and was able to amass quite a collection of free plants through my friends and classes, as any former roommate of mine will tell you. So, when I started looking for a house, gardening space was high on my priority list; if for no other reason than to finally get some of these long-suffering plants into the ground!

When I moved into my house in August of ‘07, 2 ½ years ago, all of the planting beds were full of annuals and a few dying conifers. Each planting bed had a thin layer of black hardwood mulch on top of black ‘landscape’ fabric. These are two of my most hated landscape materials. [Hardwood mulch leaches nitrogen from the soil and is not the most aesthetically pleasing. ‘Landscape’ fabric is a weed barrier which in turn becomes a barrier for light, air, water, and nutrients.] So the first order of business was to remove the fabric and top dress with fine-textured pine mulch (a.k.a. soil conditioner).

In the process, I removed all manner of weeds and various trash I found under the ‘landscape’ fabric. At this point in my horticultural knowledge, peonies were unknown to me. As I came across these bizarre looking bulbs, I threw them away! (This was particularly painful once I realized how expensive peonies are) Luckily a small grouping of them evaded me, and the next spring I was blown away by their beauty and fragrance. They’re not in the most ideal location in my garden from an aesthetic perspective, but so far I’ve been too apprehensive to move them. The peonies, a dwarf nandina hedge, a few perennials, and a pair of dwarf Alberta spruce are all that remains of the landscape I inherited.

Thursday, February 4, 2010

hollyhocks


During a trip to LA in the summer of 2008, I visited the Hollyhock House. What makes this visit so special to me is the souvenir I brought home: Hollyhock seeds from the Hollyhock house! This iconic piece of architecture sits perched atop Olive Hill in Hollywood. From this site, so aptly chosen for its views of the Los Angeles basin, you can see the Hollywood sign and the Griffith Observatory.

Frank Lloyd Wright designed the Hollyhock house for oil tycoon heiress, Aline Barnsdall. Hollyhocks were her favorite flower and Wright used stylized representations of them on architectural details and furnishings throughout the home. Completed in 1921, during Wright’s self-described ‘California Romanza’ period, Hollyhock House represents Wright’s first project in Los Angeles. The 36 acre parcel was originally envisioned as a theatrical community. However, because of artistic and budgetary differences between Barnsdall and Wright, only three structures were ever realized.

Today, only the main house and a secondary structure remain on 11 acres. The unkempt, sparse interiors and lackluster gardens left me wondering what had happened to the glorious house and grounds I had seen in countless architectural books. The only saving grace for me, were the Hollyhocks. The architectural stalks and backlit blooms of this incredible flower stood as a living witness to FLW’s inspiration. Amazingly, I found not only beautiful flowers, but also near bursting seed pods. I stuffed as many into my camera case and pockets as I could without looking too ‘obvious’. Never in my life had I wanted to grow Hollyhocks, but now I wanted to cultivate a multitude of them.

That was a year and a half ago. So what of my hollyhocks? Well, they were germinated over the winter of ‘08/‘09 in a greenhouse. I planted several of the beefier specimens in the skinny planting bed between my driveway and neighbor’s fence this past summer, here’s hoping they survived our record breaking cold winter. And the remaining seedlings currently reside in a greenhouse. 100 seeds became 18 seedlings, which have whittled away to 6. Since Hollyhocks are herbaceous biennials or short-lived perennials, I don’t have much time. If I could get just a few to bloom this year and hopefully go to seed, I would be beyond thrilled. Here’s to FLW’s brilliant marriage of architecture and horticulture.


For more information on the Hollyhock House, please visit their website.