Tuesday, February 15, 2011

How to Make a Wire Trellis for a Brick Wall


Whether you want to cover up an unsightly façade or add another dimension to your outdoor space, a vine-covered brick wall is an easy project that will enhance any garden area. Choose your vine carefully though, as some vines grow aggressively and can over-take a structure quickly. For these reasons, two species to avoid are Ivy (Hedera sp.), and Wisteria (Wisteria sp.).

Proper vine selection will help determine the ultimate success of your project. It may be preferable to have foliage year-round but many vines with big, showy blooms are either deciduous plants or annuals. Also, take into consideration sun exposure, water requirements, and winter hardiness when selecting a vine.

You will need:
1 ½” fluted masonry nails
Hammer
Safety goggles
Measuring tape or ruler
Steel wire (I used 28-gauge picture hanging wire)
Pliers to cut the wire (scissors will work too)
Natural twine
Vine for planting

Instructions:
Pick a starting point on the wall a few feet up from the ground, directly behind the vine’s location. (The vine should be planted as close as possible to the wall.) Hammer masonry nail approximately ½” into the mortar joint so that 1” of the nail is exposed. (Wear safety goggles when hammering to prevent eye injury.)

Measure 12” above and below the nail (or roughly 4 brick courses) and drive nails or mark locations with painters tape to nail later. Measure 12” to either side of the three nails and continue with this grid pattern as desired for the height and width of the space and/or expected size of the vine. When all of the nails are in place, begin tying the wire.

Start at the highest point above the vine; tie the wire in a knot over the nail. From that nail, shift down and to the left (approximately 45-degrees); loop the wire around the next nail twice and continue looping nails in that direction to the last nail and tie another knot.

Repeat this design by connecting all of the adjacent nails above and below the strung wire so that when finished, there are multiple parallel strands of wire at a 45-degree angle from the center. Trim excess wire from all knots.

Knot the wire around top nail once more and replicate these steps on the right side, achieving a mirror of this pattern to the right of the vine. Trim excess wire from all knots.

After planting, begin weaving the vine’s branches through the wire supports. Periodically attach stems to the wire support with double-knotted twine. Trim excess twine from all knots. When finished, mulch the vine and water thoroughly.

Monday, January 31, 2011

first blooms of 2011!


As big snowflakes flurried around Nashville this morning, I saw the first signs that spring is in fact right around the corner…daffodils peeking through the soil! It will still be several weeks before they bloom, but it is exciting nonetheless. Today I was also greeted by the first bloom of 2011, Witchhazel (Hamamelis vernalis).

Witchhazel is a beautiful large shrub of which there are several native varieties. Landscape features include gorgeous yellow fall color and pungently fragrant yellow/orange flowers in late winter. This is a great shrub for massing in the back of a naturalized border planting. “A tough plant with an alley-cat tenacity” says woody plant expert, Dr. Dirr.

Another plant on my bloom watch list is the Lenten Rose (Helleborus). Speaking of Lenten Rose, the person who introduced me to that amazing perennial, Dr. Allan Armitage has revised Armitage’s Garden Perennials. The new version will be out this summer and is a must-have book for any perennial gardener.

Last weekend I took advantage of extraordinarily mild temperatures to finish cutting back all remaining perennials and mulching a few of the planting beds. Working in the garden, I noticed how graceless my large butterfly bush has become. I’m going to have to cut it back and remove a lot of water sprouts before it leafs out.

[Water sprouts are vigorous growths along a branch that grow almost vertically and are aesthetically displeasing.]

This time of year can be down-right depressing with grey days and freezing temperatures. Knowing that spring will soon be here provides some relief from winter doldrums. Until then, I will keep thumbing through garden catalogues and dreaming of warmer days and the beautiful blooms to come!

Tuesday, January 4, 2011

winter gardening


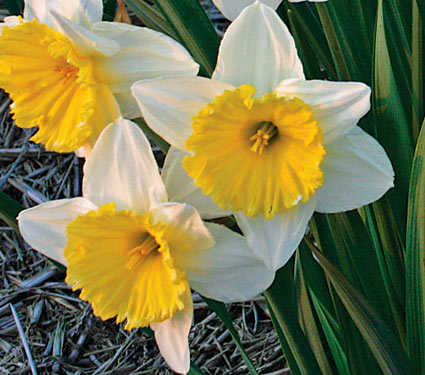
I planted a handful of daffodils last weekend. The image to the left is 'Ice Follies'; can't wait to see them come up this spring! I was pleased to find that it was relatively easy to dig the 6" daffodil holes in most areas of the garden. I sprinkled a few by the back door, some on either side of the front steps, and a few on the other side of the driveway.

While I was digging, I noticed that the pachysandra has spread even more, with little shoots coming up about 12-18" from the large clump near the back door. This time of year, garden troopers like Pachysandra and Lenten Rose (Helleborus) really shine while everything else is dormant.